QUESTION
I see that Text Styles are used to control the appearance of most of the text in Chief Architect. How can I use them to customize the text in my drawings?
ANSWER
A Text Style is simply a collection of text attributes such as font, color, and size which you can set up to meet a particular drafting need and then apply to any object that has text associated with it.
Text Styles make it fast and easy to ensure that objects in a given plan or layout file use identical text attributes.
Chief Architect's installed template files include a selection of predefined Text Styles. These can be customized as needed and, if you require more variations in your text, you can also create new custom Text Styles.
To customize an existing Text Style
- Open the plan file in which you would like to customize an existing Text Style.
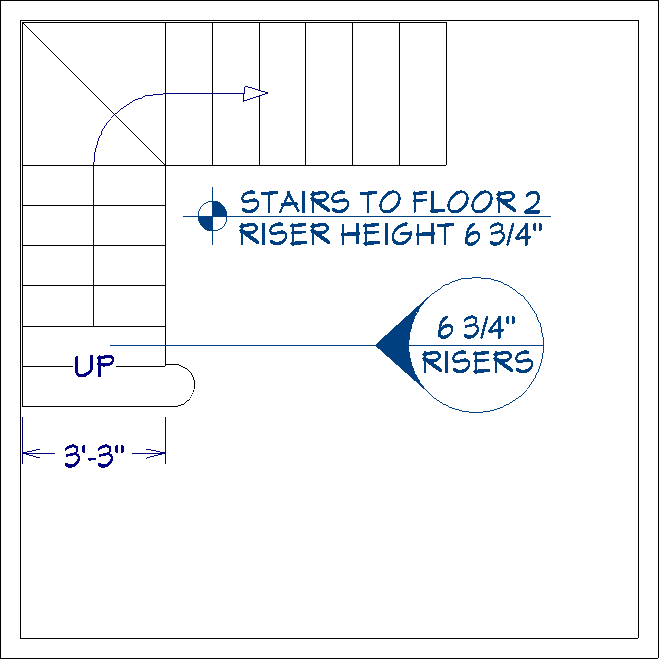
In this example, we are using the Working Plan View which primarily uses the Default Text Style for its layers, and we are working with a simple drawing with some stairs and text objects.
- Select Edit> Default Settings
 from the menu.
-
In the Default Settings dialog:
- Expand the Text, Callouts and Markers category.
- Select Text Styles from the list.
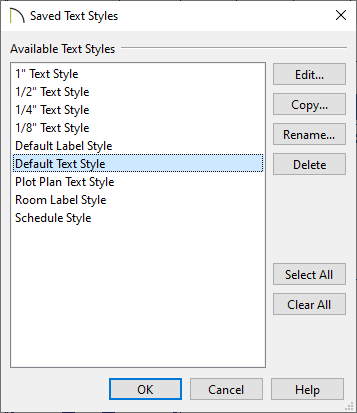
Don't confuse Text Styles with the various (Saved) Text Defaults.
- Click the Edit button.
- In the Saved Text Style Defaults dialog select the Default TextStyle and click Edit.
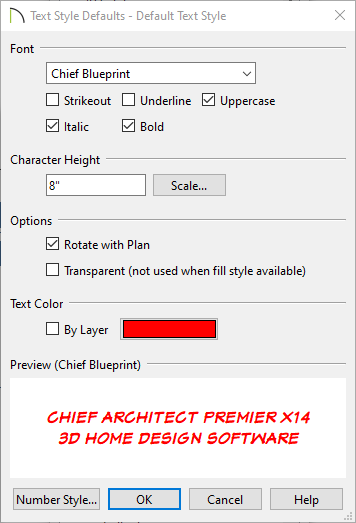
- In the Text Style Defaults dialog, make any desired changes to the Default Text Style and click OK.
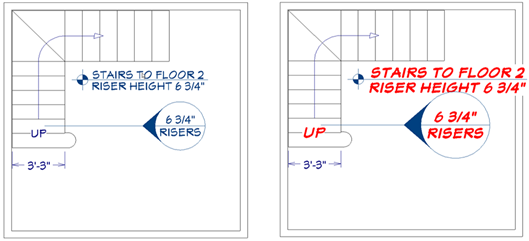
For the purposes of this example, we will check Bold, Italic, and Uppercase, change the Character Size to 8" and the font Color to red.
- Click OK to close the Saved Text Style Defaults and Done for the Default Settings, as well, and see the results of these changes in floor plan view.
- Select Edit> Undo
 to undo your changes to the Default Text Style.
To create a custom Text Style
- Click the Select Objects
 button, click on an object with a Text Style you wish to modify, and then click the Object Layer Properties
  edit button.
- In the Object Layer Properties dialog:
- Select the layer associated with the object's text. In this example, that layer is "Stairs & Ramps, Up/Down Arrows".
- Click the Define button to the right of the Text Style drop-down list.
- In the Saved Text Styles dialog, click the Copy button.
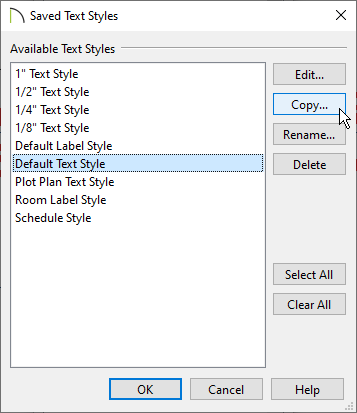
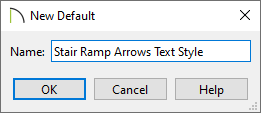
- In the New Default dialog that appears next, type a descriptive name for your new custom Text Style.
- In the Text Style Defaults dialog, specify the attributes that you want for your custom Text Style.
- In this example, the same changes are made as in step #5, above.
- Click OK to close all dialogs.
- Before you close the Saved Text Style Defaults dialog, notice that your new Text Style's name is now selected in the list.
- Your new custom Text Style is now available for use and has been assigned to the "Stairs & Ramps, Up/Down Arrows" layer. It can be also assigned to other objects, as well.

To assign a Text Style to a layer
- Select Tools> Layer Settings> Display Options
 from the menu.
You can also access these layers by using the Active Layer Display Options  on the right side of your screen.
- In the Layer Display Options dialog:
- Scroll through the list of layer names to find the one you want to assign a new Text Style to.
- Click on the layer name to select it.
- Select the desired Text Style from the Text Style drop-down list.
- Click OK to close the dialog and apply your change.
To specify a Text Style using the object/defaults dialog
- Select Edit> Default Settings from the menu and open the defaults dialog for a supported object.
- In the Saved Defaults dialog, select the name of a Saved Default.
- In this example, we will open the Callout Defaults dialog and use the Plan Callout Defaults.
- On the Main Text Style panel:
In X13 and prior use the Text Style panel instead:
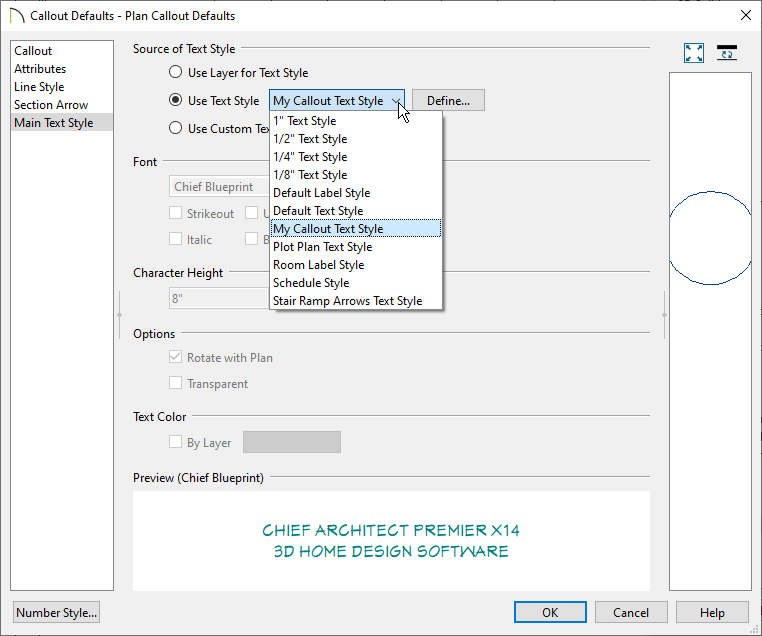
- Click the radio button beside Use Text Style;
- Select the desired Text Style from the drop-down list;
- Click OK to close the dialog and apply your change.
The selected Text Style will now be used whenever a new callout is created while the Plan Callout Defaults are active - as they are when using the Working Plan View.
Text Styles can also be assigned to individual Text objects, Callouts, Markers, and Schedules in their specification dialogs.
The Dimension Line Specification dialog does not have a Text Style panel; however, you can specify which Saved Dimension Default a dimension line inherits its attributes from on the Dimension panel of the dialog.