QUESTION
I am using X17, and I need to import a project or asset someone sent to me. What is the best way to accomplish this?
ANSWER
In X17, projects and assets can easily be imported into your Chief Architect program using the Import functions available within the program. Additionally, files can be imported directly into existing projects using the Project Browser.
Reasons you might perform an import of these files:
- Copying/transferring files from a different computer
- Receiving file(s) from a client or colleague
- Adding files to an existing project
Assets are external files that are referenced by plan and layout files. Some examples include images, PDFs, material textures and maps, and backdrops.
Importing projects
- Navigate to File> Import Project
 when the Dashboard is active or File> Import> Import Project if an existing file is active.
- In the dialog that appears, select a .caproj file, then click Open.
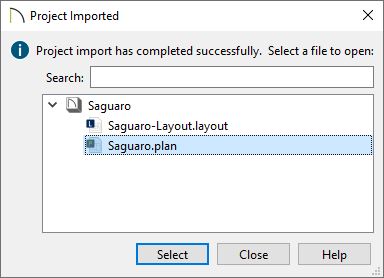
- If you're using Project Management, the Project Imported dialog will open and state "Project import has completed successfully. Select a file to open:". You can choose to either open one of the files within the project or click Close at this time.
All plan and layout files associated with the imported project will be listed in the Project Browser  , while any assets will be listed in the Asset Management dialog.
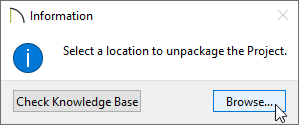
If you're using Traditional File Management, you will instead be prompted with an Information message stating "Select a location to unpackage the Project." Click the Browse button and select a folder to extract all of the project's files (plans, layouts, and assets) into.
Once a location has been specified, all plan and layout files associated with the project will open immediately in the program, and they will be listed in the Project Browser .
Importing assets (Project Management Only)
- With Project Management enabled, navigate to Tools> Asset Management
 , then click Import New.
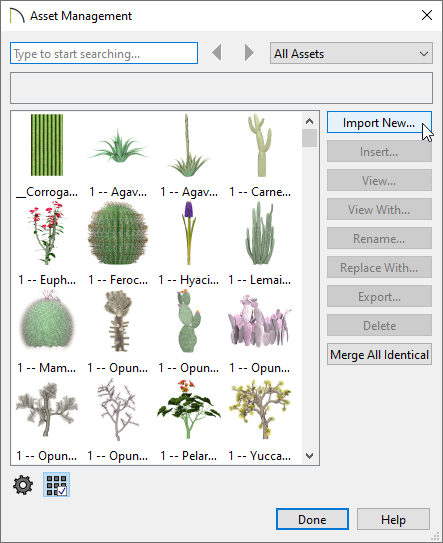
- In the dialog that appears, select the file that you want to import, then click Open. The file will now be available for use in all of your files going forward.
Importing files into existing projects (Project Management Only)
- You can import a variety of different files directly into a project using the Project Browser ; right-click on a project and select Import File(s).
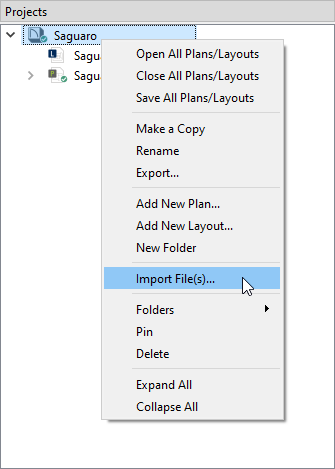
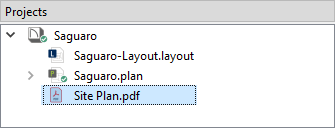
- In the dialog that appears, select the file that you want to import, such as a .plan, .layout, image, .pdf, etc., then click Open. The file will now be listed as its own line item within the project.
A Common Documents area is also available within the Project Browser when using Project Management.
Files that you might want to use across multiple projects can be added to the Common Documents; however, it's important to be aware that when a file located here is updated, it will also be updated in every file or project that references it.