QUESTION
I need to incorporate an elevator into my design. How do I create a space for an elevator and design the elevator itself?

ANSWER
An elevator can be created by establishing an elevator room, creating a shaft for the elevator, and then adding elevator-specific objects to the design.
For purposes of this example, we will be integrating an elevator into a 2 story structure and utilizing components located in the Commercial No. 12 Elevator / Escalator Bonus Catalog.
Creating the elevator room and elevator shaft
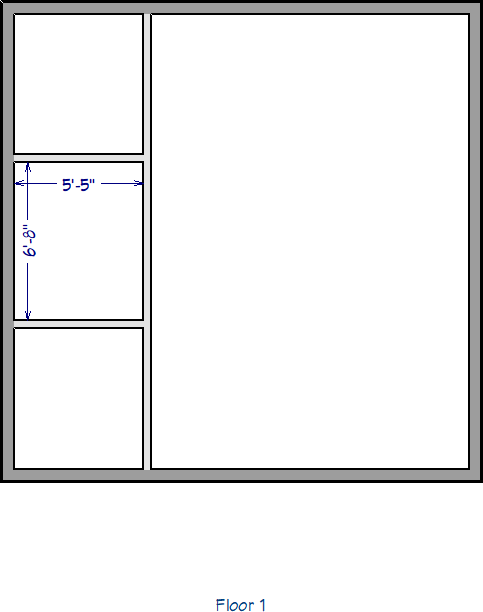
- On Floor 1, navigate to Build> Walls> Straight Interior Wall
 and click and drag to create your elevator room.
- Select the elevator room and use the Auto Room Dimension
 edit tool to create room dimensions. Use these dimensions to resize your elevator room to your desired size.
For this example, our elevator room will be 6' 8' x 5' 5".
If you're using larger pocket doors, like we will be using in the Detailing the Elevator section, you will also want to create walls for the pocket doors to recess into.
For information on moving walls using dimensions, please see the Related Articles.
- Using the Select Objects
 tool, select the newly created room and click on the Open Object
  edit tool.
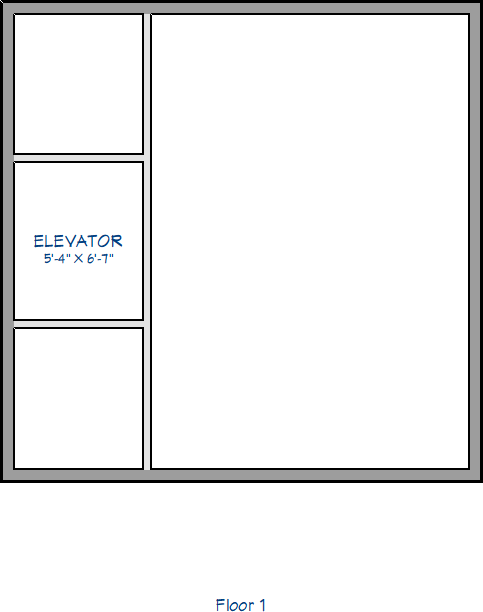
- In the Room Specification dialog that displays:
- On the General panel, leave the Room Type as Unspecified and change the Room Name to Elevator.
- On the Moldings panel, uncheck Use Floor Defaults, then click Delete to delete the molding, if one exists.
- Click OK to save your changes
Do not adjust the Ceiling Elevation to match the size of the elevator shaft. We will instead create the elevator shaft by utilizing rooms that are defined as "Open Below".
- With the Select Objects tool selected, hold down the Shift key on your keyboard, group select the walls used for your elevator, then select Edit> Copy
 from the menu.
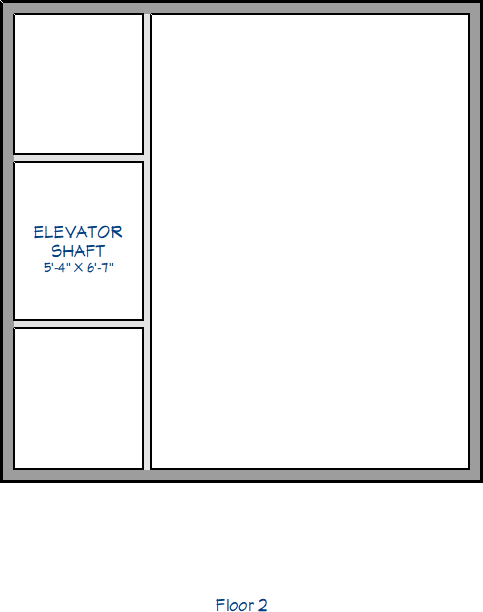
- Go Up One Floor
 to Floor 2, then navigate to Edit> Paste> Paste Hold Position
  to paste your elevator walls in the exact X and Y location as Floor 1.
- Remaining on Floor 2, using the Select Objects tool, select the newly created room and click the the Open Object edit tool.
- In the Room Specification dialog that displays, change the Room Type to Open Below and change the Room Name to Elevator Shaft.
If you would like to see your elevator in 3D on Floor 2, or any other floor, you will instead want to leave the room as Unspecified so a floor platform will generate for the elevator.
- Repeat Steps 6-8 to create an elevator shaft room on any remaining floor levels.
Now that the elevator room and shaft are created, we are ready to detail the elevator room, such as adding doors, buttons, and changing materials.
Detailing the elevator
- To add a door to your elevator, return to Floor 1, navigate to Build> Door> Pocket Door
 , then click to place a pocket door along the wall that leads to the elevator shaft.
- Select your door using the Select Objects tool, then click on the Open Object edit tool.
- In the Interior Door Specification that displays:

- On the General panel, change the Door Style to Slab.
- Set the Width and Height of the door.
In this example, the Width is set to 60" and the Height is set to 80".
- Check the Separate Trim and Materials on Each Side checkbox.
- On the Options panel, underneath of 3D Display, check the Show Open box.
- On the Casing panel, uncheck the Use Interior Casing box.
- Click OK to save your changes.
- If your door is no longer centered, select the door and use the Center Object
 edit tool to center your door on your elevator room.
- Navigate to Build> Cabinets> Soffit
 and click and drag inside of your elevator to draw the soffit. This will act as the ceiling for the elevator and can be customized to your liking.
- If it's not already open, navigate to View> Library Browser
 to open your Library Browser side window, then navigate to Bonus Catalogs> Commercial No.12 Elevator / Escalator> Elevator:
- Select the Elevator Indicator object and click outside of your elevator doors to place it.
- Select one of the Elevator Handrail objects and click to place along the inside of your elevator to place the handrails. Resize the handrails until they line the inside of your elevator room.
- Place and position both the Elevator Button Panel - Exterior and Elevator Button Panel - Interior.
- Navigate to Build> Electrical> Light
 , then click to place a light into your elevator, which will integrate into the soffit placed in Step 5.
This will place a standard recessed can light, but you can find additional styles in the Library Browser by going to Core Catalogs> Architectural> Lighting.

- Create a 3D view of your elevator by navigating to 3D> Create Perspective View> Full Camera
 and clicking and dragging towards your elevator.
- Navigate to 3D> Material Painter> Material Painter
 and in the Select Material dialog that displays:
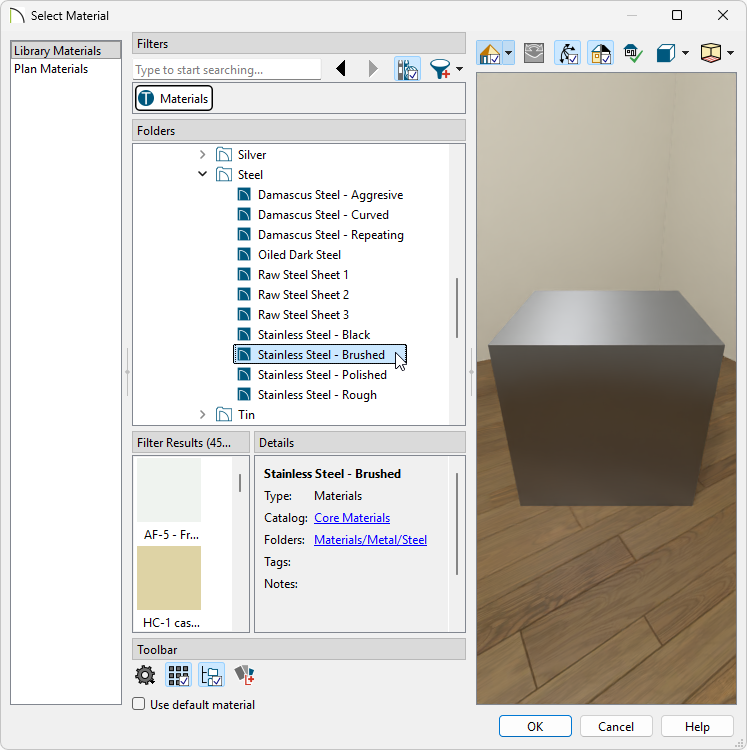
- On the Library Materials panel, find a metal material that you would like to use for your elevator.
A selection of metals can be found in Core Catalogs> Materials> Metal.
In this example we will use the "Stainless Steel Brushed" material.
- Click OK to return to the camera view.
- With the Material Painter tool still active, click on the elevator components to paint them with the Stainless Steel Brushed material.
This includes both sides of the pocket door and the interior walls of the elevator room.
