QUESTION
Wall framing isn't generating correctly in my plan. What might be the cause?
ANSWER
A number of factors will cause a wall not to produce wall framing. Below are some of the most common causes, and how to correct them so that framing will generate for all of the walls in your plan.
To build wall framing
- In your plan, navigate to Build> Framing> Build Framing
 .
.
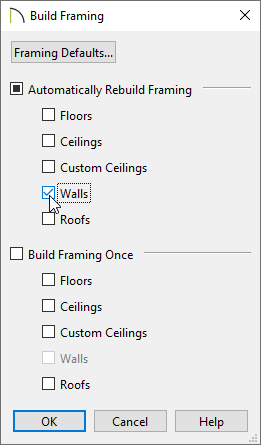
- In the Build Framing dialog, check the Walls box under either the Automatically Rebuild Framing or Build Framing Once section.
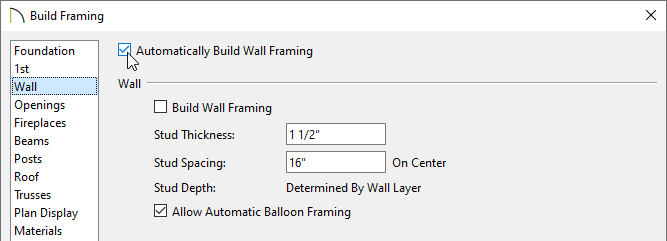
In X15 and prior, check the Automatically Build Wall Framing or Build Wall Framing box located on the Wall panel.
- Click OK to generate wall framing throughout the plan.
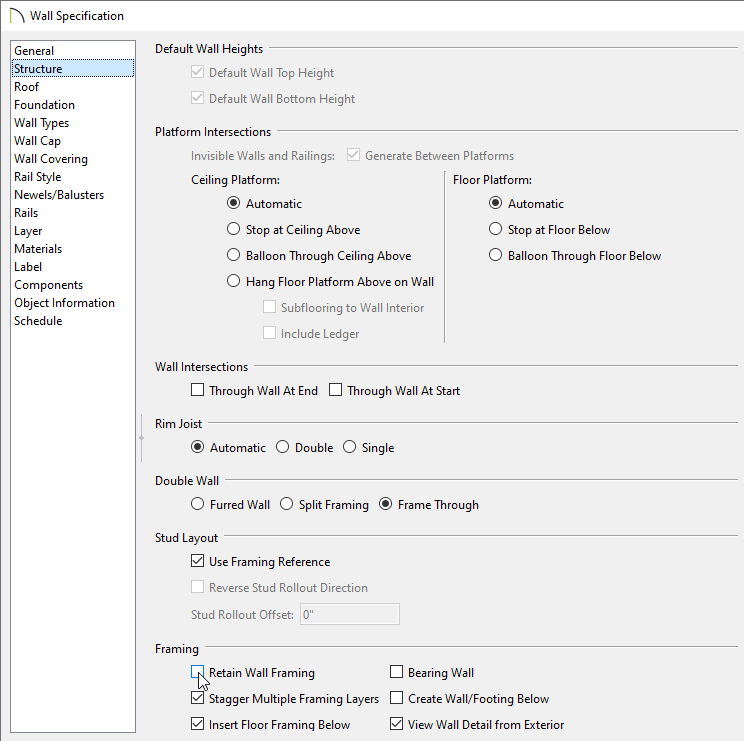
If wall framing does not generate, it's possible that the Retain Wall framing setting is enabled in one or more of your walls, preventing framing from rebuilding.
To check for Retain Wall Framing
- Use the Select Objects
 tool to select a wall that is not framing correctly, then click the Open Object
  edit tool.
- On the Structure panel of the Wall Specification dialog, if there is a check next to Retain Wall Framing, remove it, then click OK.
- If you did not select Automatically Build Wall Framing earlier, then you will need to access the Build Framing dialog and rebuild the wall framing to see this change take effect.
If framing still will not generate, or if Retain Wall Framing wasn't selected in the steps above, it may be that the Main Layer for this wall type is set incorrectly
To verify the Main Layer(s) are setup correctly
- Use the Select Objects
 tool to select the wall in question, then click on the Open Object
  edit tool.
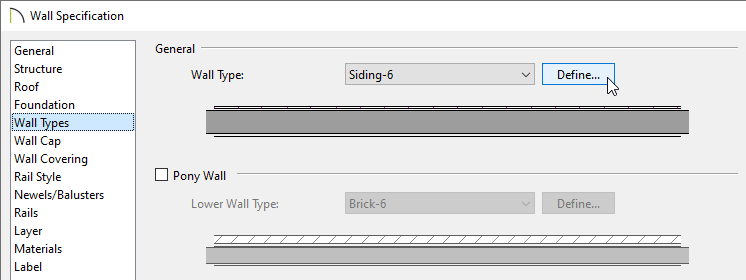
- Select the Wall Types panel in the Wall Specification dialog that displays, then click the Define button next to the Wall Type drop-down.
- In the Wall Type Definitions dialog, which appears next:
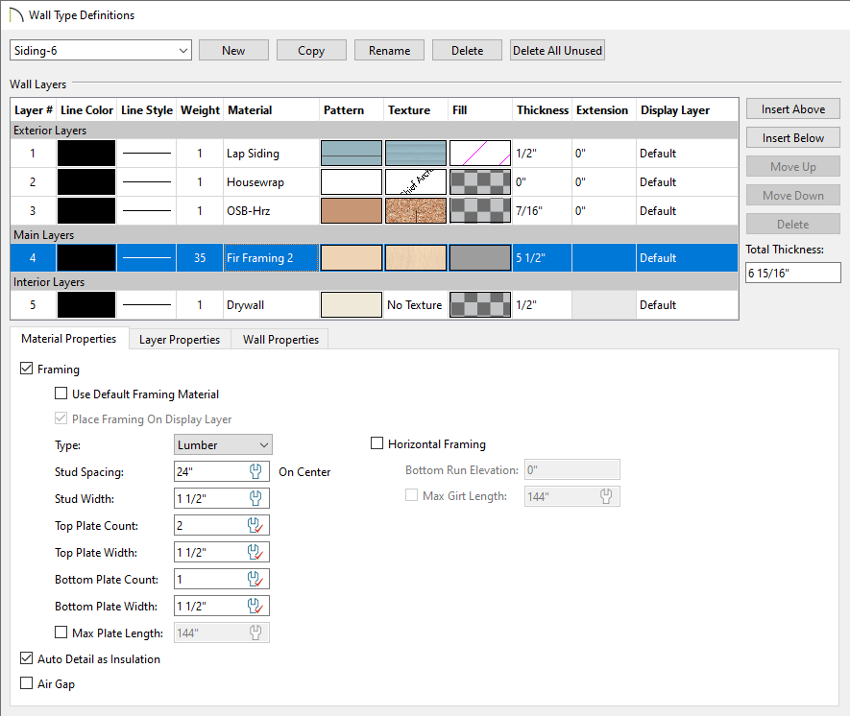
- Make sure that the Main Layer, which should typically consist of a framing material, has the Framing box checked within the Material Properties tab or Material Layer section.
In X12 and prior versions, this area was not available. Instead, verify that the Main Layer has a framing material applied, such as Fir Stud 24" OC.
- If the framing layer is not in the Main Layers section, click on the framing layer to select it, then use the Move Up or Move Down buttons to place it into the appropriate section.
- If multiple layers are designated as Main Layers, one of these layers must have the Framing box checked or have a framing material applied.
- Ensure the other framing options, such as Stud Spacing and Stud Width, are setup properly.
- Once you have completed this procedure, click OK, then rebuild the wall framing in your plan.
ADVANCED TROUBLESHOOTING
If wall framing still fails to build after following all of the steps above, then please contact Chief Architect Technical Support using the Technical Support Center.
- If the issue only seems to occur in one particular file, use the Backup Entire Plan/Layout
 tool to create a folder with a copy of the problem file, along with all referenced files.
See Knowledge Base article: Using the Backup Entire Plan/Layout Tool to Send Files to Another User.
- Sign in to the Technical Support Center and create a new support case to send to Technical Support.
See Knowledge Base article: Using the Technical Support Center.
- Give the case a short but descriptive title.
In the text of the case, type a detailed description of the problem. The more detailed you are, the more likely we will be to reproduce the issue and identify the problem.
Click the Browse button and attach the Backup to your case, then Submit it.
 .
.

 tool to select a wall that is not framing correctly, then click the Open Object
  edit tool.
 tool to select the wall in question, then click on the Open Object
  edit tool.
