QUESTION
How do I specify the on-center spacing for wall framing?
ANSWER
On-center spacing values can be specified for each wall layer that is defined as framing within any given wall type. This provides you full control over various different wall types in a plan, including those that may consist of multiple framing layers.
Before changing the on-center spacing value for a framing wall layer, consider specifying a commonly used value for the default stud spacing field located within the Automatic Framing Defaults.
Setting the default stud spacing
Wall types, specifically framing wall layers, will not follow the default Stud Spacing value located in the Framing Defaults unless they have been chosen to do so within the Wall Type Definitions dialog. Please see the next section to learn more.
- In your desired plan, navigate to Edit> Default Settings
 , expand the Framing category, select the Automatic Framing option, then click Edit.
In X16, select the General Framing option, then click Edit.
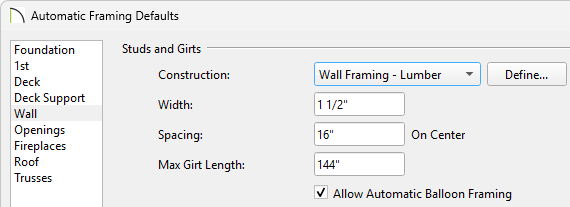
- On the Wall panel of the Automatic Framing Defaults dialog that opens, specify the desired Spacing value.
This value is measured from stud center to stud center.
- Click OK and Done to close the dialogs.
Setting the on-center spacing for a framing wall layer in X18 and newer
- Select Build> Wall> Define Wall Types
 from the menu.
- In the Wall Type Definitions dialog, select your desired wall type using the drop-down menu in the top left corner, then select one of the wall type's framing layer(s) by clicking on it within the Wall Layers table.
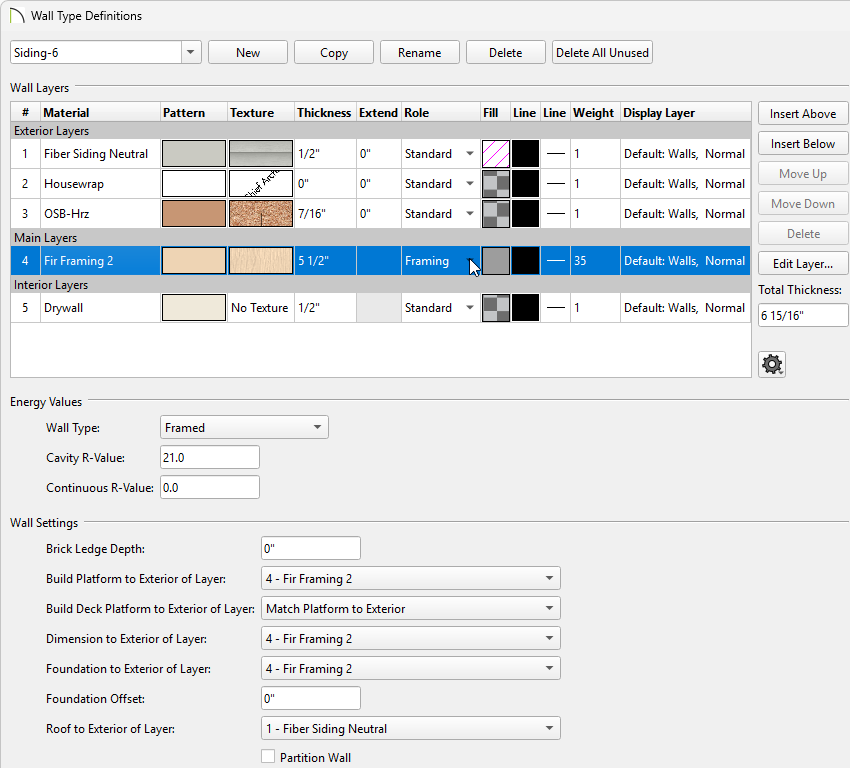
- With a Framing layer selected, click the Edit Layer button to the right of the Wall Layers table to open the Wall Layer Specification:
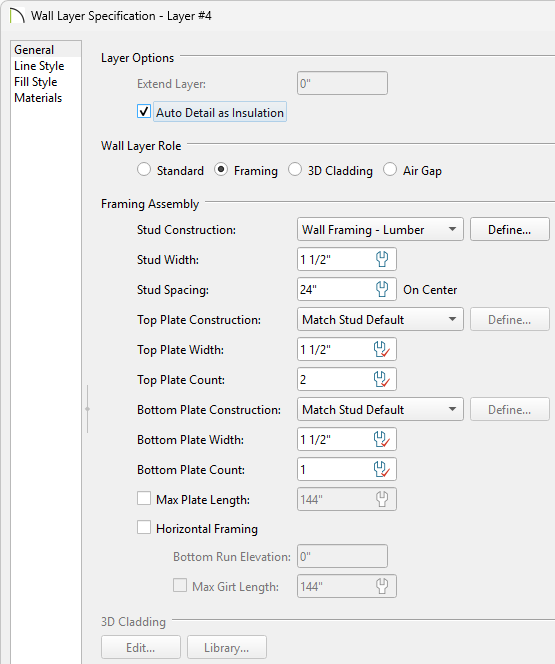
- Ensure that the Wall Layer Role is set to Framing.
- In the Framing Assembly section, adjust the Stud Spacing value. Additionally, you can select the Default wrench next to the Stud Spacing value to set it to match your default stud spacing, as discussed above.
- Click OK once you've finished making your changes.
- Make any other desired changes, then click OK to save the changes you made to your wall types.
Setting the on-center spacing for a framing wall layer in X17 and prior
- Select Build> Wall> Define Wall Types from the menu.
- In the Wall Type Definitions dialog, select your desired wall type using the drop-down menu in the top left corner, then select one of the wall type's framing layer(s) by clicking on it within the Wall Layers table.
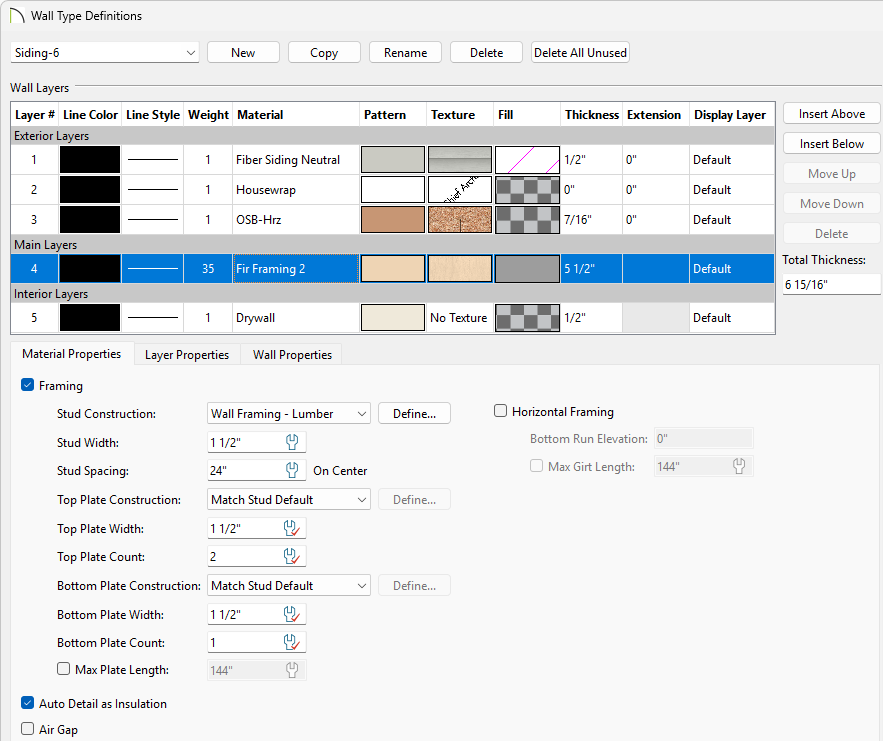
- If it's not already checked, check the Framing box located on the Material Properties tab.
- Specify the desired Stud Spacing. Additionally, you can select the Default wrench next to the Stud Spacing value to set it to match your default stud spacing, as discussed above.
- Click OK to close the dialog and save your changes.
The next time you build wall framing in this plan, any walls using the wall type you just edited will use the stud spacing that you specified.
